Rebirth of a 1972 18' Sea Ray 190 I/O Pg 3
Engine and other mechanical work:
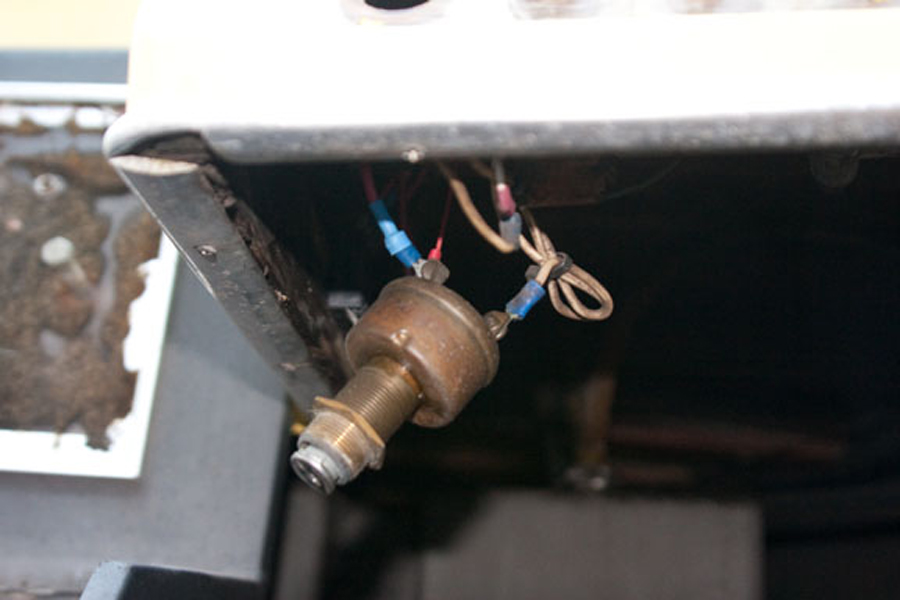
I installed a new ignition switch, alternator, battery box. When installing new electrical equipment it is important to keep safety, US Coast Guard, and ABYC standards in mind. Trying to save a few dollars here could cost you your life later. Safety standards for electrical equipment are designed to eliminate sparks, sources of ignition, and to prevent fires and explosions. The most common source of fires on boats is from electrical wiring and equipment, so doing it right is vital. Yes, marine equipment costs more. It is manufactured to more rugged standards than automotive, and made in much smaller volumes, so naturally the price will be greater, but it is worth it. What is peace of mind worth to you?
 |
 |
 |
There may have been nothing wrong with the old ignition switch, but I did not have a key for it so I purchased a new one. As it was an exact duplicate, installing it was just a matter of hooking up the wire. The old alternator was shot. It was horribly corroded and completely useless. So I replaced it with a new 40 amp marine alternator. The drive belt was also replaced.
The same is true of fuel system equipment, hoses, fittings and carburetors. Marine carburetors are designed to keep a fuel leak from overflowing onto the engine and into the boat. They are also set up for a different duty cycle than auto engines, because typically boat engines run under a constant heavy load, and tend to be run at a steady higher rpm than auto engines. So the jets and calibration of the carburetor are different. Outwardly they may look the same, but the insides are not. Fuel system standards are designed specifically to eliminate leaks and any source of fuel vapor in the boat.
Engine: The distributor, the old one in the photo below, is an automotive distributor, with a vacuum advance. Not only is it not ignition protected it is not correctly set up for a marine engine. I bought a new Mallory distributor designed for marine use and ignition protected. To determine if the engine was frozen, I first turned it over by hand with a wrench. I then took out the spark plugs and sprayed a lubricant into the engine. WD40 works well for this and there is a product called BP Blaster that is designed for this. Then, using the starter, I bumped the engine over. If you do this you do not want to actually crank the engine, unless it is in the water or has a set of muffs and a water hose hooked up to pump water through the engine. Doing it without cooling water can burn up the impeller and water pump.
 |
 |
Ventilation: New hose, new collector box.
Ventilation systems are designed to recycle the air continuously so in the event vapor does accumulate, it will be blown out of the boat away from any sources of ignition. This is why there is a label saying to run the blower for four minutes before starting the engine. Also, it is easy to double the amount of air, just increase the openings and hose sizes from 3 inch (7 cm ) to 4 inch (10 cm). I n my case this was not necessary because this boat has two intakes and two exhaust hoses.
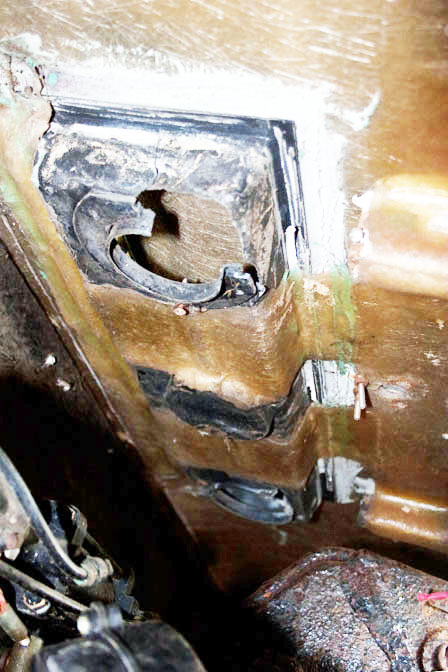
The collector box for the powered ventilation was beyond repair. It was made of plastic and over the years had fallen apart. I removed the blower and tested it. It worked fine. I also removed all the old vent hose because it was brittle and dirty. I replaced it with new. The big issue was making a new collector box. Getting it out was an issue because the manufacturer had fiberglassed it onto the underside of the deck. I had to use a saw to get it out. Then I had to remove any fiberglass that was left with a chisel to prepare a smooth place to put in the new one.
Using the old one as a template I first made a new one out of heavy paper. I then took it apart, folded it flat and used it as a pattern on a piece of sheet aluminum. This I bent into the correct shape, and cut two three inch ( 7cm) diameter holes for the hose and blower. I glued a piece of 1/4 inch (6 mm) plywood to the bottom to give it rigidity and something to anchor the blower to. I then used 3M 5200 to glue the collector box to the bottom of the deck and braced it in place with scrape lumber. It took two days to set up. Once it was set up I put HVAC aluminum tape along all edges to seal any gaps that may not have been filled by the 3M 5200.
Content Continues After Ad
Controls: Morse Throttle control.
The Morse control was stuck. Getting it out is not easy on this boat, although there are only two screws holding it in place. But by being careful and taking my time I manage to get it out. If you do this take photos, or draw pictures of how it is connected to the throttle and shift cables, so that when you re-install it the set up is the same, Otherwise you will have to adjust it. For this you need the service manual.
So I took it apart and greased it, and put it back together. But the neutral safety switch was cracked and came apart. Even so I glued it together using Super Glue Gel, and put the control back in. It worked, but not well. I found another control on EBay and purchased it. I installed this one and it works much better.
So what is a Neutral Safety Switch? Most power boats are required to have start in gear protection. This prevents the engine from starting if the drive is in gear. It applies to anything with more than 115 pounds of thrust, about 4 horsepower (3 kw). Because of accidents where an engine would start inadvertently and throw someone over the side or back of the boat, the industry adopted start in gear protection in the 1960's and the USCG adopted it in the 70's. The USCG regulation applies only to outboards, but the ABYC and international standards apply to all power boats. The neutral safety switch achieves this. On some boats it is a mechanical connection but on many it is an electrical switch.
Do not confuse this with a kill switch or safety lanyard. These are separate devices designed to stop the engine if the driver is tossed out of their seat or thrown overboard.
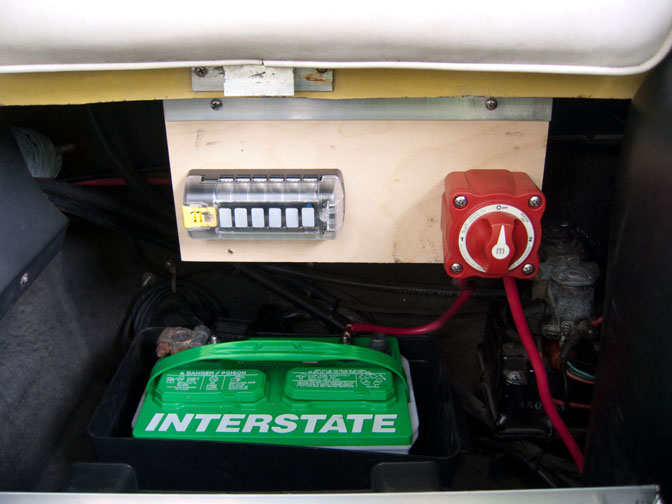 |
Electrical: I have done some electrical replacement, but this is a job for the future. I did put in new wiring for the bow navigation light and for the fuel gauge. The ignition switch was replaced. I also installed a battery switch and a fuse block. The fuse block will eventually be connected near the battery. Now, wiring from the engine and battery has no overcurrent protection. All fuses are under the dash at least 15 feet (4.6 m) from the source of power. All wires going to the instrument panel are fed off of the starter solenoid, and are unprotected. There was no way to shut off the battery. I installed a battery switch between the battery and the solenoid and new cable from the battery to the engine.
All the electrical connections have been disconnected, cleaned, and re-connected. Several things that had not worked, such as the trim/tilt control, now work.
Sterndrive: I greased all the zerk fittings on the stern drive. For those of you who don't know what a zerk fitting is (they are not used much since the 1980's) see https://en.wikipedia.org/wiki/Grease_fitting.
 |
The boat was taken to Commencement Bay Marine Services in Tacoma for a complete change of the bellows and seals. They did an excellent job.
I replaced the impeller in the lower unit. It had probably been in the boat for 40 years. Changing the impeller is easy to do. There are quite a few videos on YouTube (http://www.youtube.com/) that show how to do it. Here is a link to one of them. https://www.youtube.com/watch?v=kfpasFN_g8w and https://www.youtube.com/watch?v=0QC6_j2_wmA However I had a problem getting the lower unit back on. It would not completely seat itself, with about a 1/4 inch (6 mm) gap. So I took it to Commencement Bay Marine Services again and within 15 minutes it was back on.
More Engine Work: The second time I put the boat in the lake the engine overheated almost immediately. I assumed that this was due to the impeller destroying itself. So I bought a new impeller kit. But I also checked the raw water cooling system to see if there were problems. There were! Big problems.
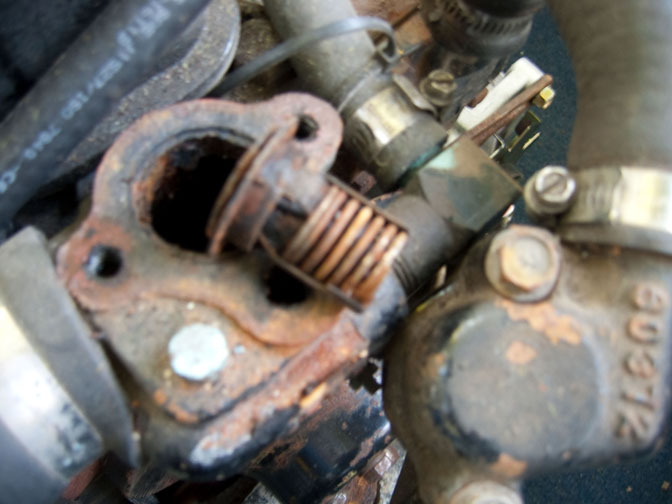
The thermostat was a rusted hulk. The thermostat housing was full of rust in big chunks. I tried cleaning it out but there was so much of it, I just decided to replace the housing. The water hose from the circulation pump (the one on the engine) was full of debris. Inside were the remains of the reinforcing spring for the hose, and a lot of other debris. The water pump was corroded out and the pump vanes had chunks of rust stuck to them.
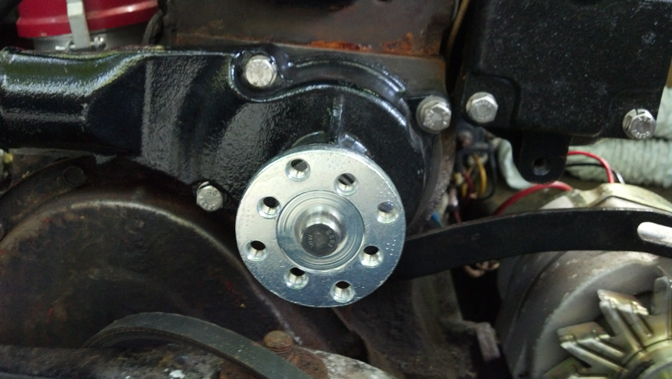
I remove the end plates on the water cooled exhaust manifold and it was full of rust too. So I took the manifold and the exhaust riser off the engine. I replaced the thermostat, thermostat housing, water pump, the exhaust manifold, and the riser. Also inside the exhaust tube is a valve called a shutter. It is there to prevent water from being sucked up through the exhaust into the engine. That was missing. See photo on the left below of new manifold, water pump (behind pulley) thermostat housing and hoses.
However, as usual I hit a snag. In the middle photo , notice that the bolt immediately to the right of the last bolt on the manifold, is missing.
I cleaned everything up. I put the new manifold and gasket on, started tightening bolts (alternately, first one end then the other, the the middle two, and so on) and when I got to that one, which was the last to be tightened, it would only tighten so far and then it slipped!. I nearly threw in the towel. Possible stripped threads in the block, and other thoughts (not printable) went through my head. Then I took the washer off and tried it again, and this time it tightened up, but with the washer it's too short. So I looked at various alternatives. I tried chasing the threads with a tap. That didn't work. So, what to do? Get a longer bolt? Put in a stud? In the last photo the original bolt is on the right, and it's hard to see but only about 1/4 (6 mm) to 3/8 inch (10 mm) was actually in the hole, which is a good inch (2.54 cm) deep. So getting a longer bolt might work. The new bolt was exactly the same length and just wasn't grabbing enough threads.
So I took one of the old studs and screwed it in and it held but the threads aren't very deep, so I bought a new stud with deeper threads (last one on the left.) This will go all the way into the hole and have plenty of thread engaged. I then put a washer and nut on it, and cut off any excess, so it isn't sticking out there to cut me every time I work on the engine.
Then I finished up by installing a new inlet water hose, a new exhaust hose/bellows, a new water shutter, and a new gasket under the carburetor plate.
One extremely important thing to do when doing a rework like this, use all new bolts, nuts and screws. I used only stainless steel. This costs a little more but will last far longer than mild steel. I did not replace the riser. It was not bad inside, even though it looks bad on the outside. I will replace it in the Spring of 2013.
Future: Replace all wiring. Install fuses and re-direct wiring through the fuse block. Replace switches on the dash.
|
This Web site may contain copyrighted material the use of which has not always been specifically authorized by the copyright owner. I am making such material available in my efforts to advance understanding of educational, economic, and scientific issues, etc. I believe this constitutes a "fair use" of any such copyrighted material as provided for in section 107 of the US Copyright Law. In accordance with Title 17 U.S.C. Section 107, the material on this Web site is distributed without profit to those who have expressed a prior interest in receiving the included information for nonprofit educational purposes. For more information see: www.law.cornell.edu/uscode/17/107.shtml. If you wish to use copyrighted material from this Web site for purposes of your own that go beyond "fair use", you must obtain permission from the copyright owner. |

